



A job we started a few weeks ago.
« Back To Roofers Talk
Old School
The old siding was rotten and the trim was installed wrong. We have to install new cement board siding and shingles.
More pictures as we get farther on the job.
old school, click the edit button to view the image and url code
dennis
What a mess. I would have passed that right along to the next guy. :)
Probably could have bought a new house for what all that work must have cost.
Is that a hair dryer you are using to keep warm in picture 7? :cheer:
tinner666
Looks good! :cheer:
minnesotaroofin
Looks like you are firring up the deck and adding some ventilation? -- Some people would not have caught that repaired woodwork then just reshinglesd -- Good Job!! - I also like the way you cut out the siding around the windows doors and reflash -
Old School
Darn it! I forgot to click on the ULR button so that it could come right on this site. Is there a way for me to do that after the fact? I also wrote out captions for everyone of those pictures explaining everything we were doing and seeing, but they didn't come up on the screen either. It makes a lot more sense when I cna explain all of the details. #7 is the top of the power nailer for the siding. Stainless steel ringshanks made just for that type of material. It was about 10-15 degrees when we did most of the siding and we had to use a heat gun to stick the grace at times. That is too darn cold actually.
I have done it before and I will find out how to post pictures the way I want them eventually. I want to be like Mike from NZ. He always gets it right!
We are doing a "cold roof" on that one side only. They had leaks coming from the skylights and two other places and it needed ventilation. They will have it now.

Webmaster Steve
Just click the edit button and fix it

wywoody
That looks like a good time-filler for a slow economy. I like your flashing at the base of the siding, it looks like it has a wider base than normaly used. Did the origional roofer have an aversion to step flashing? There appears to be two flashings used on the sidewalls, but the combination didn't work as well as just step flashing would have. Also, those look like Velux skylites, but I thought Velux's flashing kit for comp was step flashings.
The Roofing God
YEAH OSB HAS PAINTED LINES ON IT WHEN YOU BUY IT Nice looking job OS--Love that old wall flashing :blink:

Jed
Nice work O/S don't envy you though being out in that all day. Keep the I+W shield in the truck you won't need a heatgun.
Old School
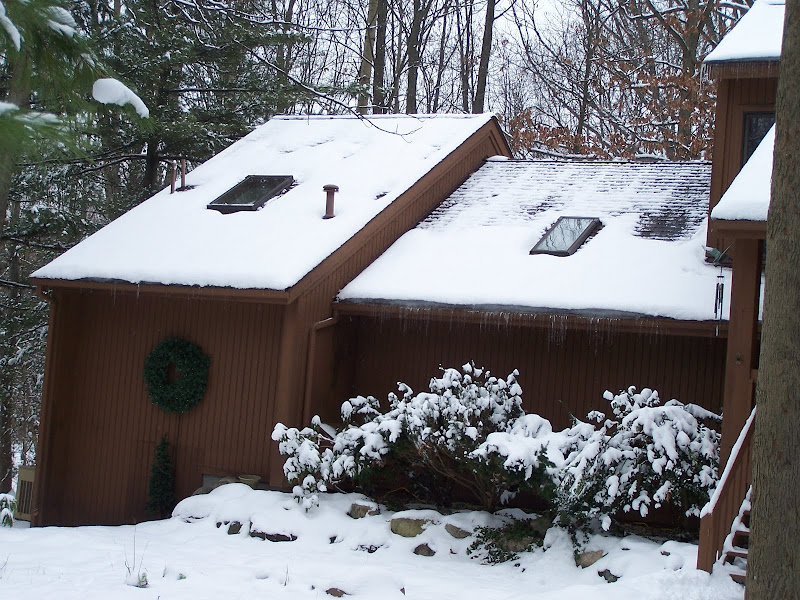
Thanks Steve! The picture on the first post is about one third of the house. This sucker is huge.
Dennis, I am the "next guy" Matter of fact, I am about the 4th "next guy" and they have all done it wrong. We will get it right for the homeowner this time. It all started from the roof on the back with the leaking skylights. Three different leaks and they all ended up in the same spot. I knew of one right away from the rot on the siding, but the urethane insulation between the rafters hid the other two. That is why we are building the "cold roof" It needs to be vented and there are other problems we see in the attic with moisture that we have to fix. It is a beautiful house on the inside, but it needed an update/ on the outside. The colors they picked out for the finish are really going to compliment the structure and the new overhangs on the rakes will break up the large open expanses.
Woody, There is nothing but time on this one, but the owner wants it done right and so does his wife. We tear it apart and I show him what is wrong and why and explain the options. I have known him for a long time and he listens to me. What a concept. Our company policy is "what would you do if it was your own house?", and that is what we do. If you look at the picture of the siding and the fascia board, you can see that they had to install the T-111 siding before they installed the fascia. I think that they put the rolled flashing on and the roofer just worked with that. It didn't work at any rate. We have done that before, but you have to make sure and bend a "return" on the side lying on the roof to divert the water back away from the deck. Just a 180 degree bend or 175 degrees so that there is a little lip that the water can't go over. They didn't, but they sure used a lot of cement.
Those are the original Pella Skylights. They LEAK! We took them out and are installing the new Velux windows. I will take some more pictures this week and post them next week. Actually, that side is done as of Friday night, but we were trying to leave for the weekend and I was in too much of a hurry to take any more. Monday!
Old School
There, I fixed the pictues with captions. That should explain a lot of what we are doing!

clublaugh
great looking job
Pot Gregory
Nice Work OS... ;)
Jed
I don't know, but that OSB shouldn't be seam on seam..
wywoody
The lower sheet is laid out full sheets from the bottom. He has the narrow fill-in row in the middle of the side instead of on the top or bottom.
minnesotaroofin
The lines are there for nailing -- 8" apart if you start on one the spacing for the studs 16" or 24" you can tell where the stud is underneith. - Also for cutting if the studs or rafters are straight.

User Access